Any questions? Give us a call 05 375 3220
Free delivery for orders over 1000 € / 30 days Return policy
Any questions? Give us a call 05 375 3220
Free delivery for orders over 1000 € / 30 days Return policy
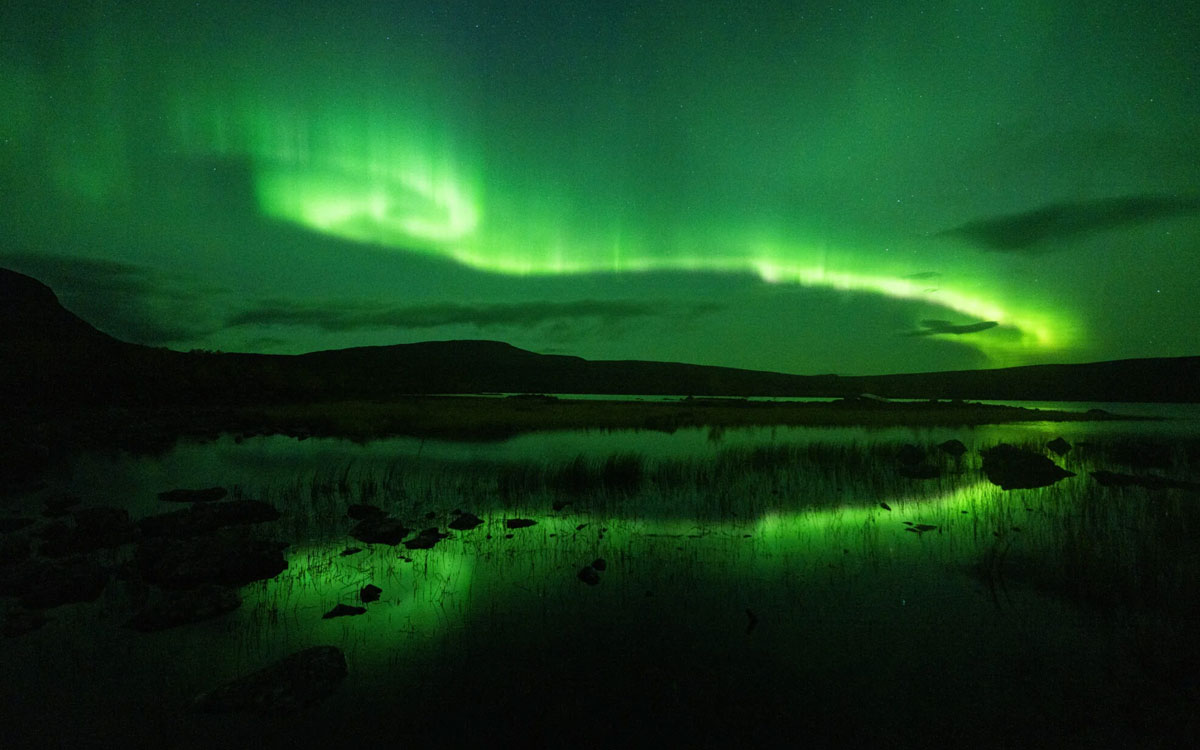
The Northern Lights are one of the most spectacular subjects to photograph in a Finnish winter, and you don’t always have to travel to Lapland to see them. On active nights, the Northern Lights can also be seen in southern Finland. Photographing the Northern Lights isn’t difficult once your camera is on a tripod and the settings are correct. In this article, we’ll go through the settings, the equipment you’ll need and how to know when to head outside.
| Regulation | Initial value |
|---|---|
| Shooting mode | M (manual) |
| Opening | The widest possible, e.g. f/1.8–f/2.8 |
| Exposure time | 2–10 s (active auroras 1–4 s, faint auroras 10–15 s) |
| ISO | 1,600–3,200, or 6,400 if necessary |
| Focus | Manual focusing using an extremely bright star |
| White balance | Approximately 3,500–4,000 K |
| File format | RAW |
| Image stabilizer | Off, on a stand |
The Northern Lights season in Finland lasts from September to March, when the nights are dark enough. The most active periods are often around the autumn and spring equinoxes. The best time of day is usually between 9 pm and 2 am, but the Northern Lights can be seen at any time after dark.
When predicting the Northern Lights, it’s worth keeping a few things in mind:
Get away from streetlights and urban light pollution. In southern Finland, the Northern Lights are usually visible in the northern sky, so choose a spot with an unobstructed view to the north, such as the shore of a lake or the sea, or the edge of a field. In Lapland, the Northern Lights may be directly overhead. It’s a good idea to frame the scene with something interesting in the foreground, such as trees, rocks, a cottage or the surface of the water, which will reflect the Northern Lights. Ideally, visit the spot whilst it’s still light so that you know where to position yourself once it gets dark.
Autofocus does not usually work against a dark sky, so focusing is the most common pitfall when photographing the Northern Lights. With many lenses, the focus ends up way off, so simply turning the lens to its extreme position is not enough.
If you can’t see any stars, you can focus on a distant light, such as a street lamp or a window in a house. You can also focus on a distant subject during daylight hours.
The choice of exposure time depends on the movement of the Northern Lights. Fast-moving, dancing Northern Lights turn into a blurry green mass with a long exposure, so a shutter speed of 1–4 seconds and a higher ISO setting will bring out the shapes and rays. For faint and slow-moving auroras, an exposure of 8–15 seconds is suitable.
An excessively long exposure also causes stars to appear as streaks due to the Earth’s rotation. As a rule of thumb, the longest exposure time before stars start to streak is approximately 500 divided by the focal length. For example, with a 20 mm lens on a full-frame camera, this is about 25 seconds; with a cropped-sensor camera, it is less. With today’s high-resolution sensors, stars may appear streaked even at shorter exposure times than this.
The Northern Lights can be photographed with almost any camera that has manual settings. The best results are achieved with a camera whose sensor performs well at high ISO settings, so a full-frame system camera is the best choice. A crop-sensor camera will also work well, provided the lens is fast. You can also get a high-quality body at an affordable price second-hand.
The lens is more important than the camera. The best lens for photographing the Northern Lights is a fast wide-angle lens, such as a 14–24 mm f/2.8 or a fixed 14–20 mm f/1.8–f/2. A wide angle of view allows you to capture a broad arc of the Northern Lights and the surrounding landscape in a single shot, whilst a wide aperture lets in more light, meaning you can keep the ISO setting lower. The 18–55 mm f/3.5–5.6 kit lens will do in a pinch, but the images will be noisier.
If you don’t want to buy your own wide-angle lens straight away, you can hire a lens from a camera hire shop during the Northern Lights season or whilst on an excursion.
Photographing in freezing conditions requires a few tricks of the trade, particularly when it comes to batteries and moisture. Read more in the article camera in the cold.
You can take surprisingly good photos of the Northern Lights with new mobile phones. A mobile phone’s camera often captures more colours than the human eye can see, so even faint Northern Lights can appear clearly green in the photo.
A mobile phone is fine for taking snaps, but when you want large prints or to capture the details of the fast-moving Northern Lights, a camera with a fast lens is still clearly the better option.
You can easily get more out of a RAW image. Adjust the white balance so that the snow and sky look natural, lift the shadows in the landscape and reduce noise moderately. Don’t overdo the saturation: natural green Northern Lights often look better than neon green ones. You can also capture the Northern Lights in a time-lapse video by taking a series of photos using interval shooting and combining them into a video.
If you want to ensure success and learn at the same time, a Northern Lights photography tour with a professional is a good option. Niko Laurila, a photographer from Porvoo, organises Northern Lights hunting and photography trips To Lapland and the northern parts of Sweden and Norway. On these trips, we actively seek out clear skies and the best photography spots, and participants receive on-site photography guidance. With an experienced guide, you won’t have to spend time interpreting the weather and forecasts; instead, you can focus on taking photographs.
In most cases, ISO 1600–3200 is a good starting point. With a fast f/1.8 lens, you can often get by with a lower ISO, whilst with an f/4 lens you may need ISO 6400. Check the histogram to ensure the image isn’t too dark, as brightening an underexposed image in post-processing adds more noise than a higher ISO setting.
The eye’s colour vision is impaired in the dark, so faint northern lights often appear as greyish-white clouds. The camera’s sensor captures light for several seconds and records colours that the eye cannot distinguish in the dark.
They can be seen, but less frequently than in Lapland. In southern Finland, the Northern Lights require greater solar activity, and they are usually visible low in the northern sky. On the most active nights, the Northern Lights can even be seen covering the entire sky.
A fast wide-angle lens with a focal length of approximately 14–24 mm on a full-frame sensor and an aperture of f/2.8 or wider. On a cropped-sensor camera, the equivalent focal length is approximately 10–16 mm.
Do you need help choosing your kit for the Northern Lights season? Come and visit our shop in Kouvola or get in touch, and we’ll help you find the right camera, lens and tripod.